How can I create a podcast on GarageBand?
GarageBand is an intuitive choice for recording your podcast. Let’s learn how to use it for producing your first episode!
- What is GarageBand?
- Features Of GarageBand for Podcasting
- How can I get GarageBand?
- Opening GarageBand
- Create a project
- Changing a few settings
- Tip: Don’t forget to save often
- Record your podcast episode
- Editing your podcast episode
- Mixing your podcast episode
- Exporting your podcast episode
- Uploading to Nightcast
- Conclusion
- GarageBand for Podcasting FAQ
What is GarageBand?
GarageBand is a music creation studio (a digital audio workstation) developed by Apple and available for macOS, iPadOS and iOS devices.
It allows users to create music and/or podcasts.
Apple positions GarageBand for the consumer market, unlike it’s more advanced Logic Pro software.
It has an intuitive design, and it is easy to learn, record, edit and share your creations.
It is a good choice for beginner podcasters wanting a quick way to produce their podcast.
Features Of GarageBand for Podcasting
GarageBand may not be the most advanced digital audio workstation (like Logic Pro) but it has many features a podcaster may need to produce their show.
- You can record your voice in a single track
- You can record different microphones on different tracks
- You can adjust the volume of your voice
- You can cut, move and delete your audio
- You can add audio effects
- You can add and play audio instruments
- You can add an equalizer and/or a compressor to your voice
- You can export all the tracks to a single file and then upload it to a podcast host
How can I get GarageBand?
To get GarageBand you will need an Apple computer, iPad or iPhone.
It’s one of Apple’s flagship software so don’t expect a windows version anytime soon.
In this tutorial we will focus on using it on a desktop, so if you’re using an iMac, Mac Book, Mac Mini or Mac Studio you’re ready to go.
GarageBand is free and it should show in your applications folder by default.
If not you can hop on the GarageBand website, click on the blue “Download” button up top and download it from the App Store.
Be sure to have the latest version of macOS installed to get advantage of all of the latest features of the software.
If you have deleted it for any reason, you can always download GarageBand again from the App Store.
Opening GarageBand
You can open GarageBand in various ways.
You can click on the Launchpad on the dock of your Mac and type “GarageBand” on the search bar.
Alternatively you can press Command + Space so the Spotlight search appears, type “GarageBand” and hit enter.
Create a project
From the sidebar on the left choose “New Project” and click on “Empty project”.
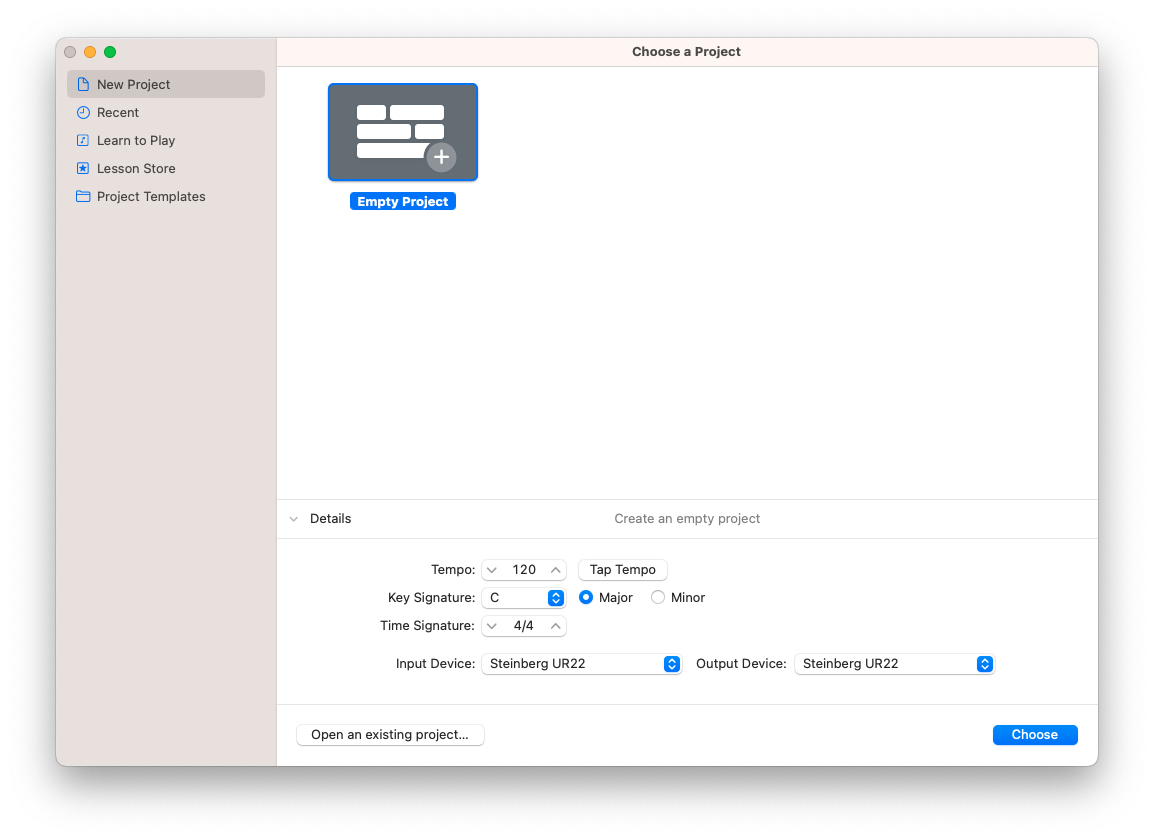
If you have connected an external microphone or audio card (via USB), you will be able to see it selected on the Input and Output devices panel. If you cannot see it, you can select it.
If it doesn’t appear on the list please check its manual for installation instructions.
To finish creating the project click the “Choose” button on the bottom right of the screen.
The project will be created and you will see the “Choose a track type” screen.
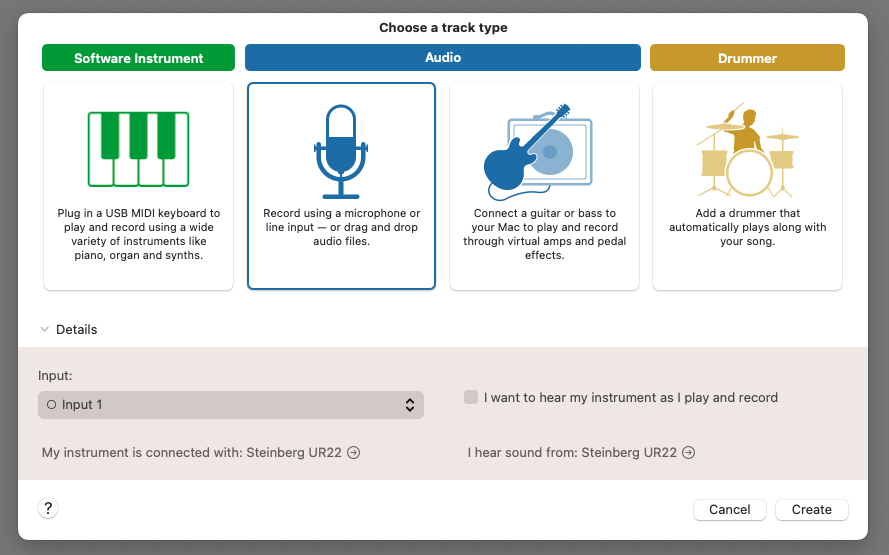
To record your voice choose the microphone icon and hit “Create”.
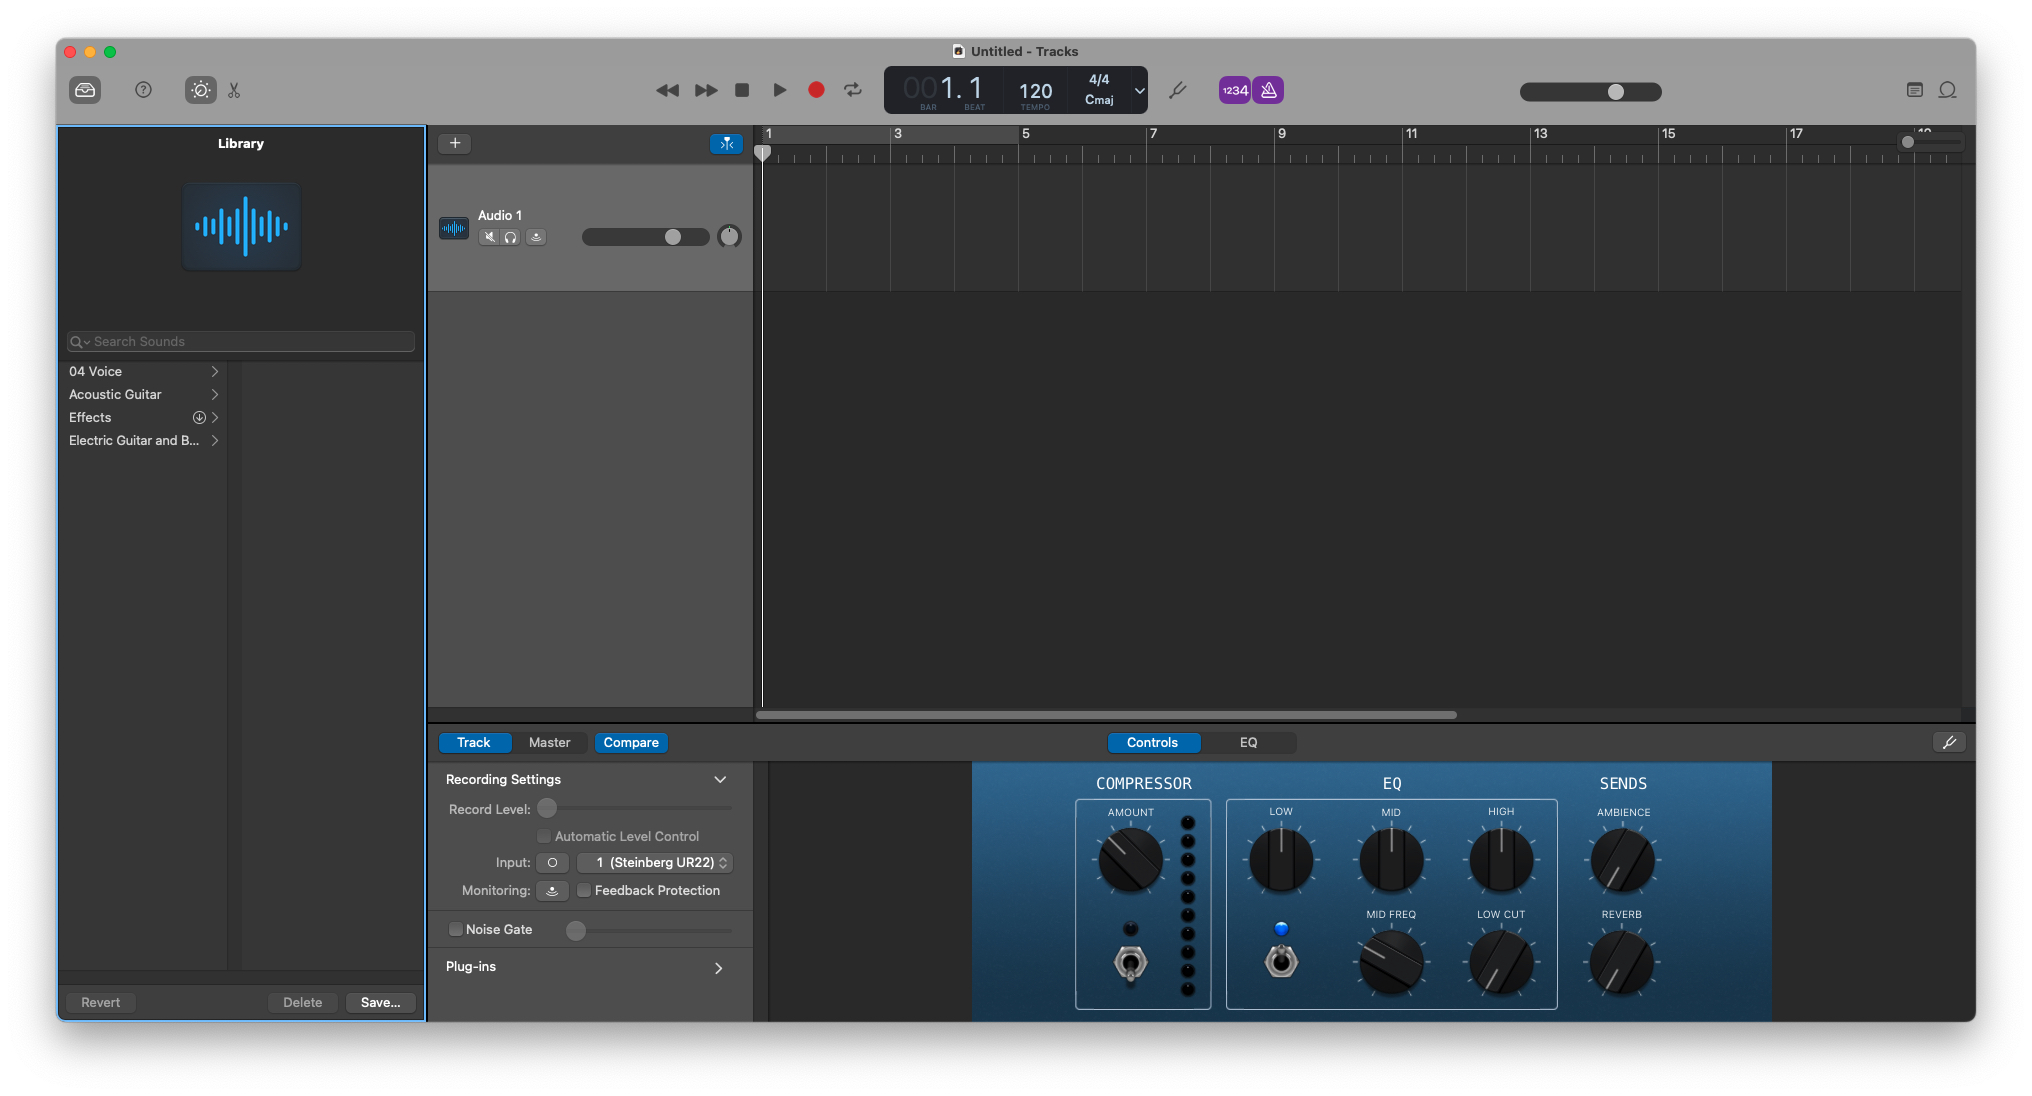
Great, now an empty GarageBand project is created with an audio track ready to record your voice.
Changing a few settings
Before being ready to record let’s change a few settings real quick.
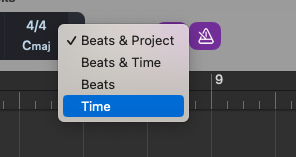
On the top middle bar, hit the down arrow and choose “Time”, so you see minutes and seconds instead of beats.
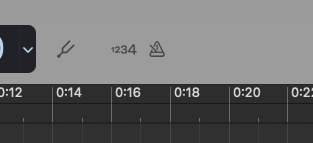
Also you will want to disable the click track (metronome) and maybe also the count in, while recording
Tip: Don’t forget to save often
I highly recommend that when recording or changing something, you often save the project so you don’t lose anything in case your computer crashes.
You can save by choosing File → Save from the top menu but it is quicker to hit Command + S.
If you do this a few times you will start building muscle memory and you will start doing it by habit every time you change something.
I know, it’s frustrating when your computer crashes and you lose your work.
Record your podcast episode
Now you are ready to start recording your voice. I suppose you have already dialed in the gain of your microphone (tips are coming in a future tutorial). If not, you can make a few test recordings and check that it sounds alright and is not clipping (sounding distorted).
Start recording your voice
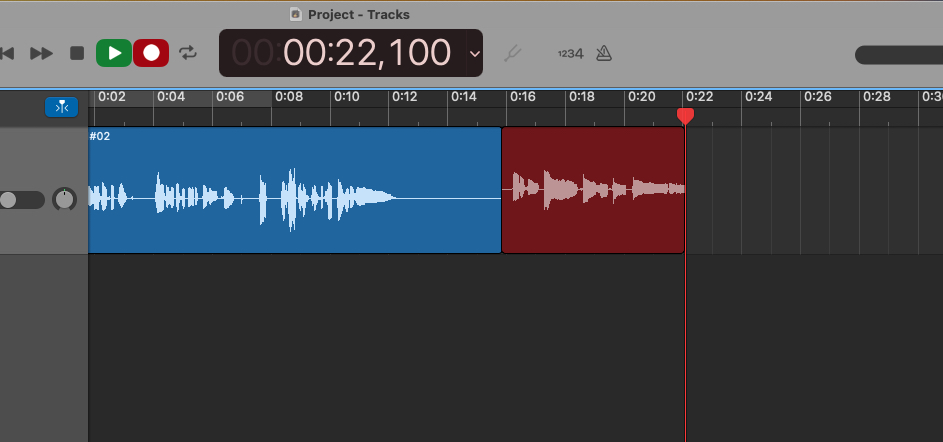
To start recording hit the red circle in the top middle.
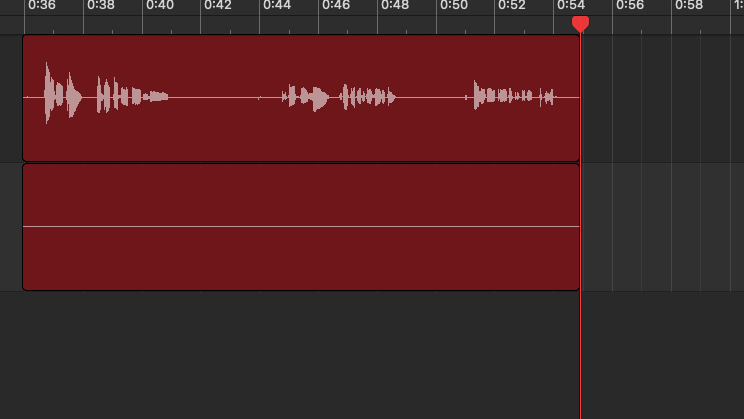
If you start talking you will see waveforms appearing on the screen.

It will look something like this.
If the waveform looks like the one on the screenshot you probably have set your gain correctly.
To stop recording you can press the space key on your keyboard.
You can continue recording where you stopped by hitting the red circle again.
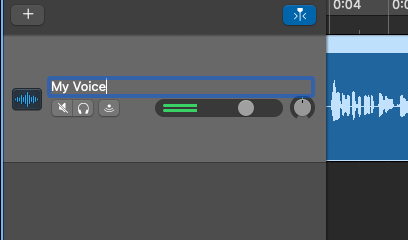
Changing the title of your track
In case you are planning to have multiple tracks for different audio sources you can rename them.
Double click on the name of the track, type a name and press enter.
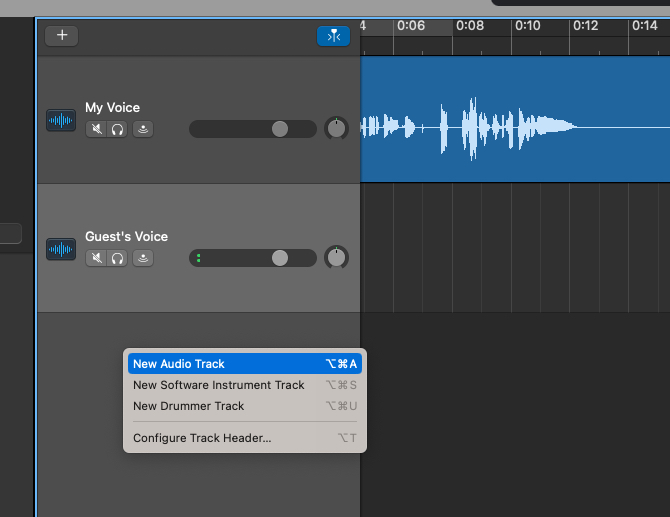
Adding a track
To add an additional track, for your guest or for sound effects for example, right click the tracks sidebar and select “New Audio Track”.
Recording to a specific track
Now that you have multiple tracks you can record to a specific track.
To select the track you want to record on, click on it on the left sidebar.
When you hit the recording button, it will start recording on that specific track.

Recording to multiple tracks at the same time
You can also, if you have multiple microphones and guests, record to multiple tracks at the same time.
To enable multitrack recording:
- Click Track → Configure Track Header from the menu up top
- Select “Record Enable”
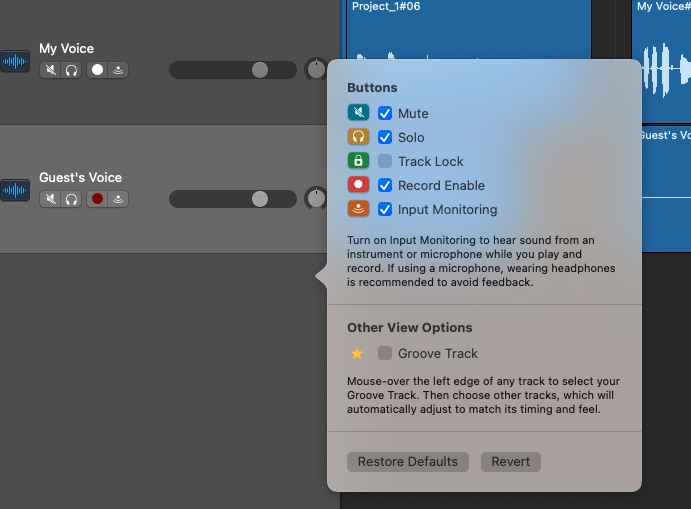
You will see, on the tracks sidebar, that a record button appears.
Press it on all tracks you want to record on so it blinks.
Now, you can select a different microphone input for each track, so you record each guest through their microphone.
Select your guest’s track and choose their input from the “Recording Settings” panel.

Now if you click on the record button you will see multiple tracks recording at the same time.
(Yes, please ignore that I haven’t connected a second microphone and that you can’t see a waveform on the second track, thank you)
Editing your podcast episode
Now that you have recorded all of your episode’s tracks, it’s time to edit them.
Move tracks around
To move tracks you can click on them with your mouse and drag them left and right or to another track.
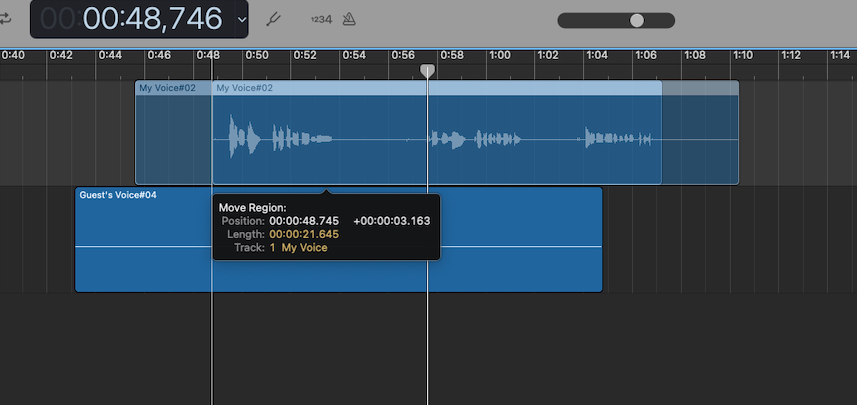
Be careful though, you don’t want tracks to overlap!
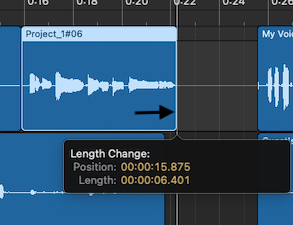
Trimming a track
You probably want to remove silence in the beginning or end of your track.
To do so, you can point your mouse at the edge of a track, and when the trimming icon appears click and drag so it gets trimmed exactly where you want it to.
The waveform will guide you as to where to stop.
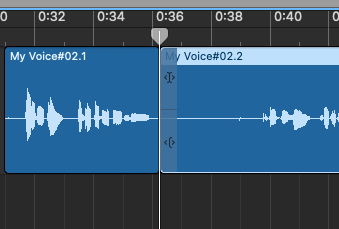
Split on playhead
You can split a track on a specific point by moving the playhead to it, selecting the track and pressing CMD + T or choosing Edit → Split Regions At Playhead
Deleting a track
To delete a track select it with the mouse and press the Delete button or your keyboard.
Alternative you can delete it by selecting it and choosing Edit → Cut.
Adding music
To add music to your project you can drag and drop a music audio file from the finder right into GarageBand.
You can edit a music track by moving it around, trimming it and splitting it so that it fits right in.
Tip: Record one track for each host
It is recommended that you record a separate audio track for each host so they sound loud and clear.
Using one microphone for multiple hosts means they will not be that close to it and reverberation from the room will be added on the audio.
If you have more guests than microphones you can always pause the recording so they get ready to record up close.
Tip: Listen to soloed tracks
When you have multiple tracks you can listen to one in solo, so you can check if it has background noise that you want to remove for example.
To listen to a track in solo:
- Select the track
- Click the headphones icon on it or press the S key on your keyboard.
When you finish editing the track you can press the S key again to un-solo it.
Tip: Cut tracks when not talking
Sometimes microphone tracks can introduce noise to the overall podcast episode when they’re active but nobody talks to them.
You may want to split and delete empty regions on a host’s audio track.
Mixing your podcast episode
Now that you have recorded your audio tracks and have placed them on the timeline where they need to be it’s time to mix your episode.
Mixing means adjusting audio levels and adding effects like equalizers and compressors.
Adjusting the level of a track
To adjust the level of a track you can click on its volume slider and drag it left to lower the volume or right to increase it.
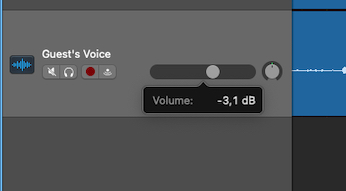
You want to adjust all the tracks so that they are nearly equal in volume so all the guests sound the same.
You don’t want one guest’s voice sounding really low and the other one’s annoyingly high.
Adding an equalizer
I recommend that you add an equalizer on each microphone track so you improve the sound a little bit.
I can’t give you the best settings, as it depends on the microphone, but in general you want to remove some of the low end and mids, and maybe increase the highs.
Start with the “Low Cut” preset and adjust from there.
Generally I’d make slight adjustments like this:
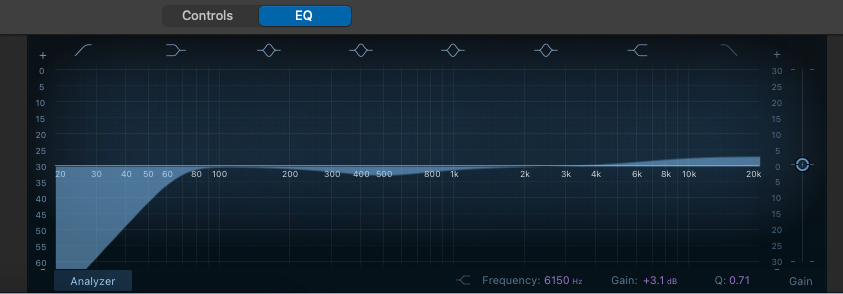
Be careful not to overdo it. Make small adjustments and listen carefully with good speakers or headphones.
If you are unsure if what you’re changing makes the audio sound better just use the “Low Cut” preset and leave it as is.
Adding a compressor
Hopefully GarageBand has a very simple compressor, an one dial one.
Adjust the amount so that when you’re speaking loudly it doesn’t enable more than 3-5 of those top lights.

Again, don’t overdo it!
Ambience and Reverb
It might be tempting to add ambience or reverb on your voice tracks.
Please don’t do it. Leave it at zero.
Nobody adds ambience and reverb to podcast voice tracks, they will sound weird!
Tip: Bad Microphone = Bad Audio
If your microphone sounds bad you can’t make it sound really good on post. No amount of tweaking with the settings will fix it.
Getting a quality microphone isn’t really expensive and using good recording technique is free!
Don’t get discouraged if it doesn’t sound great though. The content of your podcast episode is much more important than having great audio!
Exporting your podcast episode
Exporting your episode is really easy.
Once you have finished recording, editing and mixing you select Share → Export Song To Disk.
Here you have to choose the location the final file will be saved on and its quality.
Podcast hosting services may require a specific format to save your episode on, though the most safe option is MP3.
Choose MP3 and Medium Quality (128 kBit/s).
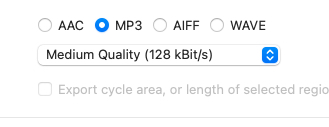
With these options, the audio will have a good balance between file size and listening experience. Listeners will be able to listen to your episode even with mobile data on the go.
Uploading to Nightcast
Now that you have your episode’s final audio file ready you can upload it to Nightcast, so it gets distributed on all apps (Spotify, Apple Podcasts, Pocket Casts, Overcast, etc).
To upload your podcast episode:
- Login to the dashboard
- Choose your podcast
- Click “Manage” on your episode
- Click “Upload Episode” and choose the audio file you exported
- Stay on the page until the progress bar moves all the way to the right
Conclusion
GarageBand is a good choice for recording podcast episodes with.
It may not have the most advanced features like Apple’s more advanced Logic Pro software but it is more than enough for recording a quality podcast episode.
It can take you very far on your podcasting journey and you can always switch to more advanced software later on, if you so wish.
Until then, learn the basics we discussed above, and focus on your podcast’s content.
That’s what matters the most and the reason listeners will keep coming back to listen to more of your episodes!
GarageBand for Podcasting FAQ
Is GarageBand a good option for podcasting?
Yes! GarageBand has all the features you need to record, edit and mix a podcast episode and it’s free. It’s more than enough to get you started!
Is GarageBand available on Windows computers?
Unfortunately GarageBand is only available on Macs. It’s one of Apple’s flagship software products and it’s unlikely for it to be released on Windows any time soon. You probably want to check Audacity. It’s also free and quite powerful (not that intuitive though).
Can I add audio effects using GarageBand?
Yes! You can add external audio effects / audio files to your podcast using GarageBand. You can also use virtual instruments to create your own.
Can I record multiple tracks at once?
Sure. You can record multiple podcast hosts and guests at the same time, using different audio inputs (microphones).
Is Audacity or GarageBand better for podcast recording?
There’s no better. Both have their pros and cons. For example GarageBand is more intuitive but only available on Mac. Audacity has more features but it’s more difficult to learn.
What is GarageBand not good at?
GarageBand is not positioned as a professional’s digital audio workstation software. It doesn’t have advanced plugins and features someone creating music or editing podcasts by trade may need. That doesn’t mean it’s not more than enough to get you started though!