A podcast equipment checklist
You are planning on starting a podcast. You have come up with a great name, you have outlined a couple of episodes, you have found how to distribute it to apps, and now it’s time to think about starting recording.
Getting the right podcast recording equipment can be daunting. There are so many choices. Dozens of microphones and software to choose from. You are confused and you don’t know what to choose. That’s normal. But it doesn’t have to be like this.
Truth is, the content of your show and the value you are providing is much more important than having the perfect audio or choosing the most suited software. These are means to an end. Everything else comes second.
With that said, it’s time to learn about everything, equipment-wise, you will need for recording your show.
The role of equipment in podcasting
As we said above, your content and how you present it come first. People will listen to your podcast because of what you say. They want to learn something that will be informative to them and help them reach a goal. Or at least be entertained.
A good microphone will make it easier for them to be able to hear you well and understand what you have to say, but only having great audio and no good content will lead them to stop listening.
You can’t “fake” having no content of value with pristine audio and showman trickery. Everybody will eventually figure it out.
What “good podcasting equipment” means
There are a lot of companies trying to come up with smart ways to sell you something. As with everything else, in professional audio, companies are using clever marketing to make their products stand out and make you think that you need them, or else you’re doomed.
Truth is, making high-quality microphones has peaked for at least 20 years, and today you can get one that will sound great for not that much.
For example, jumping from a $100 microphone to a $500 microphone won’t make your sound 5x better. Sure, there will be a difference but it will be marginal.
There are a lot of other things that play a role in the audio quality of your podcast and you can find some tips on “18 Recording Tips For A Great Sounding Podcast”.
Upgrading as you grow
You don’t have to invest thousands of dollars before uploading your first episode.
Getting a quality microphone and sound card will be a couple hundred dollars and that will be more than enough. Your audio will be clear and nobody will stop listening because of it.
As you’re growing, depending on your needs, you can add more items to your equipment, like acoustic treatment, better editing software, and a more powerful and noiseless computer.
Not having what’s “best” out there is not something that should stop you from starting today.
A complete podcast equipment checklist
Alright, now that we learned about what’s the role of equipment in podcasting and what “good equipment” means, let’s see what we will need.
A computer
No, I won’t go ahead and list what brand-new computer you should get in order to record “the perfect podcast”. That would be stupid. Chances are you already have a computer and that’s more than enough.
Recording and editing audio is not a very heavy task, so everything that came out in the last decade will do.
You can use a Windows desktop, or a MacBook, it doesn’t matter. Everything will do.
Something that you should consider is that your computer should be relatively noiseless. If it makes much noise it will be audible to your podcast, and that’s not what you want. In that case, you may need to upgrade, but firstly please make a couple of test recordings to decide if noise is a problem for you.
If you don’t own a computer and you’re planning on getting one that you will use for podcasting, I would suggest something like a new MacBook Air. They don’t even have a fan so they are totally noiseless. They are very portable so you can carry them around and record them on the go.
Of course, nowadays, tablets like iPad are powerful enough so you can record and edit your whole podcast on one of them. For more information, you can check “Recording and editing a podcast on iPad”.
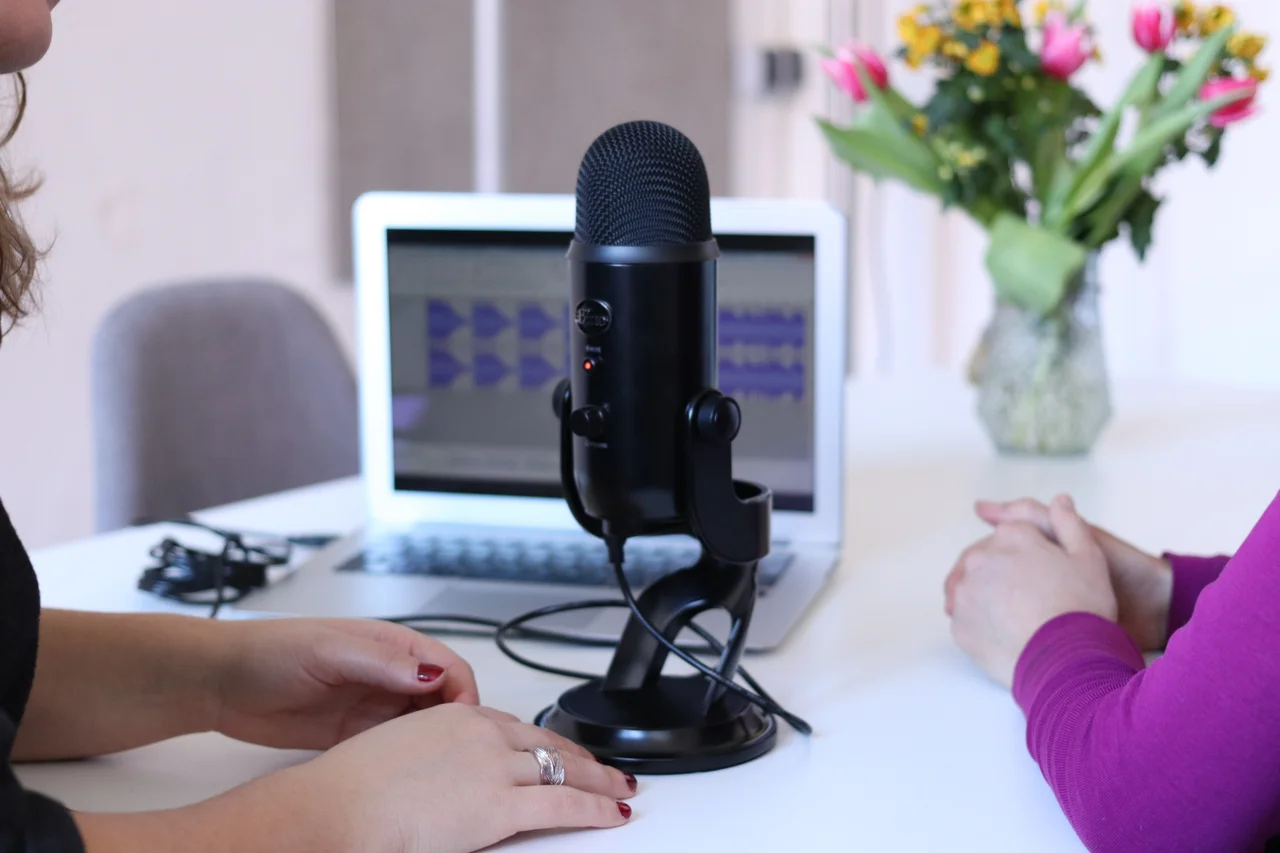
Microphone
There are different microphones that you can choose from, with different characteristics.
For example, one of the things you should consider is if you want to get a dynamic or a condenser microphone. I don’t want to burden you with technical details, but in general:
- Dynamic Microphones: They are more “focused sounding”, and they don’t pick up too much environment noise.
- Condenser Microphones: They are more “airy” and more pleasing to listen to, but they pick up more of the environment noise.
If your room is noisy and has reverberations I would definitely suggest a dynamic microphone. If it is quiet a condenser microphone would be better.
USB Microphones
Microphones with a USB output will make your life a bit easier, as you won’t need an additional sound card and USB cable. They will plug in directly to your computer and most probably will work without doing anything else.
Some well-known and tested USB microphones are:
- The Rode NT-USB+ (230$)
- The Shure MV 7 (281$)
- The Blue Yeti (99$)
Honestly, you can’t go wrong with either of them. You have probably already seen these microphones used by video makers or streamers. Just pick the one that looks best to you and it will be a great choice.
XLR Microphones
Microphones with an XLR output are the most common ones and they are used in professional recording studios. XLR is the industry standard output for a microphone.
An XLR microphone does not have a preamp, and can not be connected to your computer directly. You will need an audio interface, a mixer, or a portable field recorder. On a device like them, you can connect multiple XLR microphones and record them in separate audio files.
I personally own multiple XLR microphones and no USB ones, as they are more versatile. If I want to record a podcast on the go, I can connect them to a portable field recorder and not have to bring a computer with me at all.
There are countless XLR microphones, most of them sounding somewhat similar so don’t start researching too much as you won’t know what to choose. I will give you a few choices and just pick one of them. They will work great.
- The Rode M1 (85$). I personally use this one on a daily basis for audio recording and online calls. It works and sounds great.
- The Shure SM58 (118$). You have probably seen this being used by the vocalist at the last concert you attended. It has stood the test of time and you can’t go wrong with it.
- The Rode NT1-A (180$). Another very well-known, condenser this time, microphone that’s been used by many podcasters.
- The Avantone CK-6+ (275$). Another quality condenser microphone and it comes in red!
Don’t overthink it. Just pick one of the above and your podcast will sound great.
Use your phone
When starting out you can make some quick tests with your phone. It may have a good-enough microphone for your needs and you may find it enough.
You already have a mobile phone, don’t rule it out as an option without trying first.
Complete recording packages
Some companies offer studio packages that basically consist of a microphone, audio interface, headphones, and cables.
I would personally shy away from them and pick the pieces individually but some options are:
- The Rode NT1-A Musican Bundle (635$)
- The Focusrite Scarlett 2i2 3rd Mic Bundle (248$)
- The Presonus Audiobox 96 Studio (194$)
It’s not that they won’t work great, but it’s not difficult to pick and choose what’s better suited for you.
Microphone Stand
Chances are you don’t want to keep the microphone in your hand while recording. That would be tiring and would introduce handling noises, as microphones are sensitive.
There are many different options.
Floor Microphone Stands
These are stands that you set up on your floor and you can adjust them in whatever way you want.
You can stand up, or sit on a couch and adjust them so that the microphone is close to you.
There are many floor stand options and basically, every one of them does a similar job.
Desktop Microphone Stands
These are smaller, more portable stands that you can have on your desktop so you can have the microphone directly in from of you.
There are many desktop microphone stand options, but I would personally recommend the Rode PSA-1 (96$). I personally use this stand with my Rode M1, permanently mounted on my desk. It’s a big time saver and I can comfortably move it around before starting to record or making an online call.
Audio Interface
An audio interface is basically a device that you will connect between your microphone and your XLR microphone, and will translate the analog signal to a digital one.
If you have chosen a USB microphone you won’t need an audio interface, but with an XLR one, it’s necessary.
An audio interface can work with your desktop or laptop computer out of the box, and it can even work with an iPad, so you can conveniently record audio directly to it.
There are quite a few audio interface options for podcast creators, but I will list two of them that I have personally used and can recommend:
- The Focusrite Scarlett 2i2 3rd Gen (183$). Simple to use, has 2 XLR inputs, can connect directly via USB-C to your computer, and supports both dynamic and condenser (with +48V phantom power) microphones.
- The EVO 4 (125$). Everything is similar to the above, but it’s a bit more compact.
That’s it. Pick one of the two. I have tried them both and they work great.
Portable Field Recorders
These are portable recorders that you can use on the go, without bringing a computer with you.
Some of them even have built-in microphones, and most have XLR inputs.
They can run on battery and you can mount an SD card to record your audio on.
You can find see available portable recorder options here.
Pop Filter
A pop filter can be attached to your microphone stand, and you point it directly in front of your microphone. Its purpose is to filter out the plosives of your voice. That’s when you say “P” as in “Plosive” and air comes out of your mouth hitting the microphone directly.
Plosives will annoy your podcast listeners as they will sound boomy.
Many microphones (especially dynamic ones) have a pop filter built-in to them, so they get rid of the plosives, but not 100% so.
Especially with condenser microphones, it’s a very good idea to get a pop filter.
There are many pop-filter choices that will work great for recording your podcast. I’ve got a K&M one that I’m using for more than 10 years and it still works great.
Shock Mount
You can attach a shock mount to your microphone in order to absorb noises coming from hitting your desk or floor while recording.
I would recommend you skip this one when starting out, you don’t really need it.
Cables
You basically need 2 cables to connect your microphone to your computer:
- A USB cable that will most probably come in your audio interface or USB microphone’s box.
- An XLR cable which you have to get separately (if you chose an XLR microphone).
You can see available XLR cable options here. Everyone is basically the same and doesn’t affect audio quality. Just pick one randomly. A more expensive one will be harder to break if you don’t take care of it.
I had many XLR cables break over the years, so get 2 of them.
Headphones
You probably want to monitor yourself while recording. In that case, you can plug headphones directly into your audio interface and hear yourself. That way you can ensure that your voice sounds as it should.
You can use whatever headphones or earbuds you already have.
But if you want something more professional I would suggest the beyerdynamic DT-770 Pro 80 Ohm, which I personally use and they sound great.
Quality headphones will help you mix your podcast’s audio and make it sound better if you choose to do so yourself.
An option is to get wireless (Bluetooth) headphones so you don’t have to connect them via a cable while editing audio.
But keep in mind that wireless headphones can introduce a delay if you want to monitor yourself while recording. In that case, you will have to connect them via a cable.
Webcam
When recording a podcast episode remotely with co-hosts or guests, it is a good idea for everybody to use a webcam to make things seem more personal.
Most laptops nowadays have a built-in webcam, and that’s more than enough.
If you are using a desktop, or you want a better webcam than what your laptop offers you can get a Logitech C920. It’s well built and will last for many years to come.
In the case that you use an Apple computer and own an iPhone, you can use it with the Continuity Camera feature in order to connect it as a webcam.
Acoustic Treatment
Again, when starting out your podcast you don’t really consider acoustically treating your room.
Just be sure to record in a room in your house that doesn’t have a lot of reverberation, a stairway would not be a good option.
In case you want to make an upgrade you can get a microphone screen that you attach to your microphone stand and it will absorb some of the reflections.
In case you want to break the bank and be a total professional you can invest in an acoustic treatment set, which will include absorbers and diffusers that you can mount on your walls.
Podcast Recording And Editing Software
For recording and editing your podcast’s audio on the computer you will need a DAW (digital audio workstation) software.
Hopefully, there are many options, some of them free and some of them more advanced.
When starting out you can play with GarageBand or Audacity. They are both free and easy to use.
For GarageBand, you can check out our “How can I create a podcast on GarageBand?” article.
These two have all the basic functionality you will need to edit your episodes. You don’t want to become a professional audio editor, as you can hire one to do this for you. But if you want something more advanced there are choices like:
- Cockos Reaper. I’ve been using it for many years for recording and mixing audio and it has everything that you may need.
- Logic Pro. Available for Mac computers only, it’s been used professionally from recording and mixing podcasts to recording Billie Eilish’s latest hit.
- Adobe Audition. Adobe has brought to you software like Photoshop and Illustrator. You can imagine that Audition is a quality tool too.
- Hindenburg Pro. Another, less known but very powerful software positioning itself as a “podcasting & radio production” audio editor. I haven’t used this myself but know some big podcasters are using it.
Please don’t think that you need these, more advanced, tools to start your podcast. Start with the simpler options I listed above and upgrade if you need later.
Recording on an iPad
You can record and edit a podcast completely on an iPad. In fact, we have put out an article called “Recording and editing a podcast on iPad”.
If you have used GarageBand on Mac, there’s GarageBand for iOS too, which is similar and has all the podcasting-related functionality you will need.
Of course, you can use Voice Memos too but I wouldn’t recommend it as there are better options for podcast recording.
Other good options like Lexis Audio Editor and Ferrite Recording Studio exist too. They record high-quality audio that you can even transfer to your computer later for editing.
Browser-Based Software
A really appealing option is to use browser-based software for recording your audio.
This will make it far easier to record with multiple co-hosts and guests simultaneously as, at the end of the recording, you will get all the high-quality audio files automatically.
I think recording your audio directly on the browser is such a good option that I have written “Recording your podcast episode online on the browser” with details on how to use such software.
Organization Software
You don’t only need equipment to record your podcast, but for organizing it too. As we talked about having great content is the best way to get more listeners. And to make great content you have to plan and organize.
That’s where organization software comes into the picture. It’s software that will help you create documents, and link them together, writing down everything related to creating your podcast, creating its schedule, outlining, and more.
If you have a podcast producer you can share these pages with them so they can join and collaborate.
Online Software
The best option, in my opinion, for organizing your podcast is Notion. In fact, it’s the software I’m writing this article right now.
It has so many features like creating formatted documents, linking them together, creating databases, and more.
Honestly, create a free account and start using it right now. It will make your life easier!
In case you want more traditional, yet powerful, software, you can use the Google Docs suite. You already have a Google account and you are most probably familiar with tools like Word or Excel. Google Docs is similar but online (and free). You can continue your work on different devices and you can share your podcast folder with anybody else.
You can use Google Drive to move audio files between you and your audio editor too.
Desktop Software
If you don’t want to use fancy online software, you can use a desktop, online first too.
The downside is that you have to download this software, but chances are you already have them installed on your computer.
For example, you can use Word or Apple Pages documents to organize your information. They will work fine!
In case you are using a Mac and you want something more minimalistic, you can use Bear. It’s beautifully designed and you can sync documents between Mac, iPhone, and iPad. If Notion didn’t exist that’s probably what I would be using.
Podcast Hosting Provider
You can’t upload your podcast directly to podcast-listening apps. You will need a podcast hosting provider.
In case you are wondering why, and want to learn more check out “Why do you need a podcast host?”.
There are different options for podcast hosting, all with their pros and cons. I’ll plug Nightcast here. Hey, this is us. We will be happy to help you create and distribute your podcast!
Website Creation
There are many tools to create a website for your podcast, that you can use yourself like:
- WordPress. There are A LOT of WordPress sites in the world. I’m sure you have stumbled upon many of them.
- Squarespace. You already probably know this by the countless ads they’re putting out. It’s a good option and has many features.
- Wix. That’s another powerful website builder.
Of course, you can use the embedded player in order to have your episodes listed on your site.
If you want something more advanced, you can hire a web developer and/or web designer to help you create a totally custom website for your podcast. This is the best option if you have the budget and want to create something professional.
And lastly, the best option to create a beautiful website for your podcast quickly is using the “Podcast Website” feature that your podcast hosting provider has. In a matter of a few clicks, you can set up a website with all the information that’s needed.
On Conclusion
In this article, we talked about the role of equipment in podcasting, and what “good equipment” means, and we learned about everything you will need to start your podcast.
Don’t overthink it. If you start comparing equipment it will be harder for you to decide. The options we talked about above are battle-tested and can help you make a really good-sounding podcast.
Just get the necessary items and start making great content!